FileRun 是一个基于 Web 的文件和共享应用程序。它是 Google Drive 自托管的一个很好的替代品。它允许您共享和同步文件,通过 WebDAV 访问,甚至使用Nextcloud移动应用程序连接到它们。
在 Ubuntu 20.04 LTS Focal Fossa 上安装 FileRun
apt步骤 1. 在我们安装任何软件之前,通过在终端中运行以下命令来确保您的系统是最新的,这一点很重要:
sudo apt update
sudo apt upgrade
步骤 2. 安装 LAMP 堆栈。
需要 Ubuntu 20.04 LAMP 服务器。如果您没有安装 LAMP,您可以在此处按照我们的指南进行操作。之后,我们为 FileRun 创建一个 PHP 配置文件:
nano /etc/php/7.4/apache2/conf.d/filerun.ini
添加以下配置:
expose_php = Off
error_reporting = E_ALL & ~E_NOTICE
display_errors = Off
display_startup_errors = Off
log_errors = On
ignore_repeated_errors = Off
allow_url_fopen = On
allow_url_include = Off
variables_order = "GPCS"
allow_webdav_methods = On
memory_limit = 128M
max_execution_time = 300
output_buffering = Off
output_handler = ""
zlib.output_compression = Off
zlib.output_handler = ""
safe_mode = Off
register_globals = Off
magic_quotes_gpc = Off
upload_max_filesize = 20M
post_max_size = 20M
enable_dl = Off
disable_functions = ""
disable_classes = ""
session.save_handler = files
session.use_cookies = 1
session.use_only_cookies = 1
session.auto_start = 0
session.cookie_lifetime = 0
session.cookie_httponly = 1
date.timezone = "UTC"
保存并关闭文件,然后重新启动 Apache 服务以应用更改:
sudo systemctl reload apache2
步骤 3. 在 Ubuntu 20.04 上安装 FileRun。
默认情况下,FileRun 在 Ubuntu 20.04 基础存储库中不可用。现在我们运行以下命令从官方页面下载最新版本的 FileRun:
wget -O FileRun.zip https://filerun.com/download-latest
接下来,使用以下命令解压缩下载的文件:
unzip FileRun.zip -d /var/www/html/filerun/
我们将需要更改一些文件夹权限:
chown -R www-data:www-data /var/www/html/filerun
chmod -R 755 /var/www/html/filerun
步骤 4. 配置 MariaDB。
默认情况下,MariaDB 未加固。mysql_secure_installation您可以使用脚本保护 MariaDB 。您应该仔细阅读下面的每个步骤,这些步骤将设置 root 密码、删除匿名用户、禁止远程 root 登录、删除测试数据库和访问安全 MariaDB:
mysql_secure_installation
像这样配置它:
- Set root password? [Y/n] y
- Remove anonymous users? [Y/n] y
- Disallow root login remotely? [Y/n] y
- Remove test database and access to it? [Y/n] y
- Reload privilege tables now? [Y/n] y
接下来,我们需要登录 MariaDB 控制台并为 FileRun 创建一个数据库。运行以下命令:
mysql -u root -p
这将提示您输入密码,因此请输入您的 MariaDB 根密码并按 Enter。登录到数据库服务器后,您需要为 FileRun 安装创建一个数据库:
CREATE DATABASE prestashopdb;
CREATE USER 'prestashopuser'@'localhost' IDENTIFIED BY 'Your-Strong-Passwd';
GRANT ALL PRIVILEGES ON `prestashopdb`.* TO 'prestashopuser'@'localhost';
FLUSH PRIVILEGES;
步骤 5. 配置 Apache 网络服务器。
现在为 FileRun 创建一个 Apache 虚拟主机配置文件。您可以使用以下命令创建它:
nano /etc/apache2/sites-available/filerun.conf
添加以下行:
<VirtualHost *:80>
        ServerName your-domian.com

        DocumentRoot /var/www/html/filerun

        <Directory "/var/www/html/filerun">
                Options Indexes FollowSymLinks
                AllowOverride All
                Require all granted
        </Directory>

        ErrorLog ${APACHE_LOG_DIR}/filerun.error.log
        CustomLog ${APACHE_LOG_DIR}/filerun.access.log combined
</VirtualHost>
保存并关闭文件,然后使用以下命令重新启动 Apache:
sudo a2ensite filerun.conf
sudo a2enmod rewrite
sudo systemctl restart apache2
步骤 6. 设置 HTTPS。
我们应该在 PrestaShop 上启用安全的 HTTPS 连接。我们可以从 Let's Encrypt 获得免费的 TLS 证书。从 Ubuntu 20.04 存储库安装 Let's Encrypt 客户端(certbot):
sudo apt install certbot python3-certbot-apache
接下来,运行以下命令以使用 Apache 插件获取免费的 TLS 证书:
certbot --apache -d your-domian.com
您将被要求提供您的电子邮件并接受服务条款:
Enabled Apache rewrite module
Redirecting vhost in /etc/apache2/sites-enabled/filerun.conf to ssl vhost in /etc/apache2/sites-available/filerun-le-ssl.conf

- - - - - - - - - - - - - - - - - - - - - - - - - - - - - - - - - - - - - - - -
Congratulations! You have successfully enabled https://your-domain.com

You should test your configuration at:
https://www.ssllabs.com/ssltest/analyze.html?d=your-domain.com
- - - - - - - - - - - - - - - - - - - - - - - - - - - - - - - - - - - - - - - -

IMPORTANT NOTES:
 - Congratulations! Your certificate and chain have been saved at:
   /etc/letsencrypt/live/your-domain.com/fullchain.pem
   Your key file has been saved at:
   /etc/letsencrypt/live/your-domain.com/privkey.pem
   Your cert will expire on 2022-09-21. To obtain a new or tweaked
   version of this certificate in the future, simply run certbot again
   with the "certonly" option. To non-interactively renew *all* of
   your certificates, run "certbot renew"
 - If you like Certbot, please consider supporting our work by:

   Donating to ISRG / Let's Encrypt:   https://letsencrypt.org/donate
   Donating to EFF:                    https://eff.org/donate-le
如果测试成功,请重新加载 Apache 以使更改生效:
sudo apache2ctl -t
sudo systemctl reload apache2
步骤 7. 配置防火墙。
默认情况下,在 Ubuntu 上启用了 UFW 防火墙。根据您的 Apache 虚拟主机配置文件,打开端口 80 和 443 以允许 HTTP 和 HTTPS 流量:
sudo ufw allow 80/tcp
sudo ufw allow 443/tcp
sudo ufw reload
步骤 8. 访问 FileRun Web 界面。
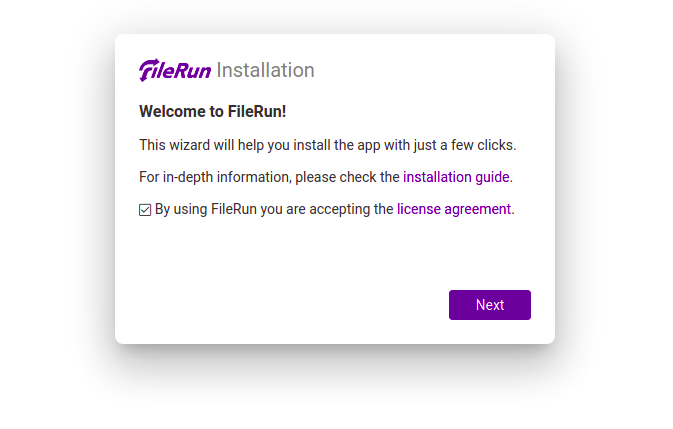
成功安装后,打开 Web 浏览器并使用 URL 访问 FileRun Web 界面。您应该看到以下页面:https://your-domain.com

感谢您使用本教程在 Ubuntu 20.04 LTS 上安装最新版本的 FileRun。如需其他帮助或有用信息,我们建议您查看FileRun 官方网站。


